
Practitioner Onboarding & Usage Guide
Everything you need to set up your account, prepare your space, and run your first Biotonix Posture assessment.
1. Introduction & Overview
Biotonix Posture is an AI-powered assessment solution designed to help healthcare practitioners — physiotherapists, chiropractors, trainers and more — support client well-being and performance. Founded by Dr. Sylvain Guimond, the system focuses on precision, simplicity and speed to provide reliable, professional evaluations.
The ecosystem consists of two main components:
- Mobile app — Biotonix Posture Assistant Pro. Used primarily for client intake and capturing images.
- Web portal — app.biotonix.com. Used for detailed analysis, marker adjustment, comparative reporting and printing PDF reports.
2. Phase I — Account Setup & Installation
Step 1: Purchase & login
- Membership. You must hold an active membership purchased via www.biotonixposture.com.
- First login. Use the email provided during purchase. If it is your first time, click "First sign in? Create a password" on the login screen to set your credentials.
- Use the same email and password for both the payment portal (biotonixposture.com/my-account) and the professional platform (app.biotonix.com) to simplify access.
Step 2: Platform access
- Mobile app. Download "Biotonix Posture Assistant Pro" from the Apple App Store (iOS) or Google Play Store (Android).
- Web portal. Access app.biotonix.com via Google Chrome.
3. Phase II — Physical Environment Setup
This setup is required for the Full Assessment (which generates exercise programs). The Quick Assessment (photo only) does not require the canvas.
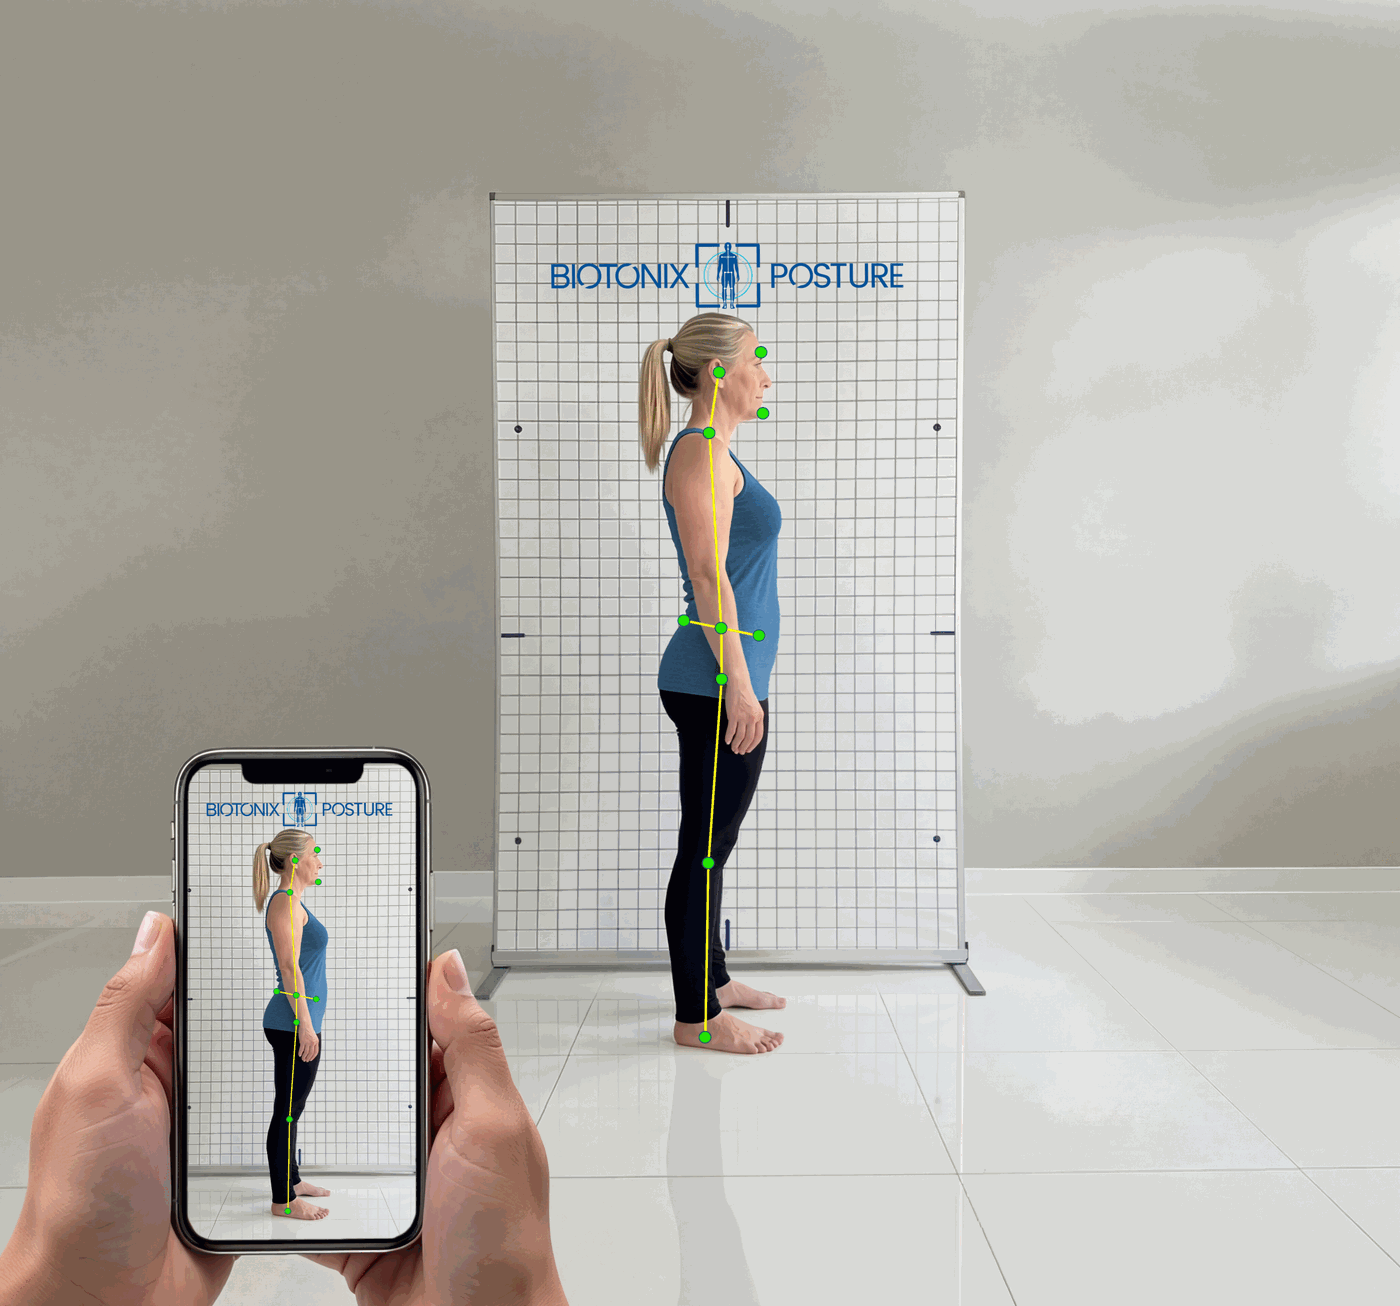
Equipment & space
- Calibration grid. The portable backdrop grid is mandatory for Full Assessments — it provides the AI's reference markers.
- Distance. Place the camera (tripod recommended) 8–10 ft (2.5–3 m) from the grid. Mark the distance with floor tape so follow-up assessments stay consistent.
- Alignment. The camera must be perpendicular to the grid (90°), aimed at the patient's hip level.
- Lighting. Ensure even lighting. Avoid windows behind the subject — backlighting causes silhouette issues.
Patient preparation
To ensure AI accuracy, the patient must follow the clothing protocol:
- Clothing. Minimal, tight-fitting clothing — loose clothes obscure landmarks.
- Accessories. No shoes, socks, hats, watches or glasses.
- Hair. Tied up; neck and ears must be visible.
4. Phase III — Performing an Assessment
Step 1: Create patient & consultation (mobile app)
- Log in to the Biotonix Posture Assistant Pro app.
- Tap the user icon to create a new patient — first name, last name, date of birth and gender.
- Select "New Consultation".
- Choose the assessment type: Quick Assessment (photos only, instant visuals, no canvas) or Full Assessment (requires grid; generates the full PDF report and the 10-week exercise program).
- Enter the patient's height, weight and activity level (Low, Moderate, High).
Step 2: Image acquisition
- Positioning. The patient stands close to the canvas without touching it. Have them march in place and take a deep breath to settle into a natural posture.
- Capture. Take 3 pictures using the app's guidance overlay: lateral (side), anterior (front) and posterior (back).
- Alignment. Ensure the blue and gray crosses in the app overlay meet at the center of the calibration canvas.
Step 3: AI validation & marker check
After capture, the AI places anatomical markers:
- Green dots — high-confidence placement.
- Yellow / red dots — verify these markers. If a knee marker is too low or a wrist marker too high, adjust it later on the web portal.
5. Phase IV — Analysis, Adjustments & Reporting
Photos are taken on mobile, but detailed analysis and adjustments should be done on the web portal (app.biotonix.com).
Adjusting markers (web portal)
- Log in to app.biotonix.com using Google Chrome.
- Navigate to Patients → [Name] → Consultations → Image Processing.
- Drag & drop. If the AI misplaced a marker (e.g. ulnar styloid or knee joint line), drag it to the correct anatomical position.
- Save. The system recalculates angles and rewrites the exercise logic in under 10 seconds.
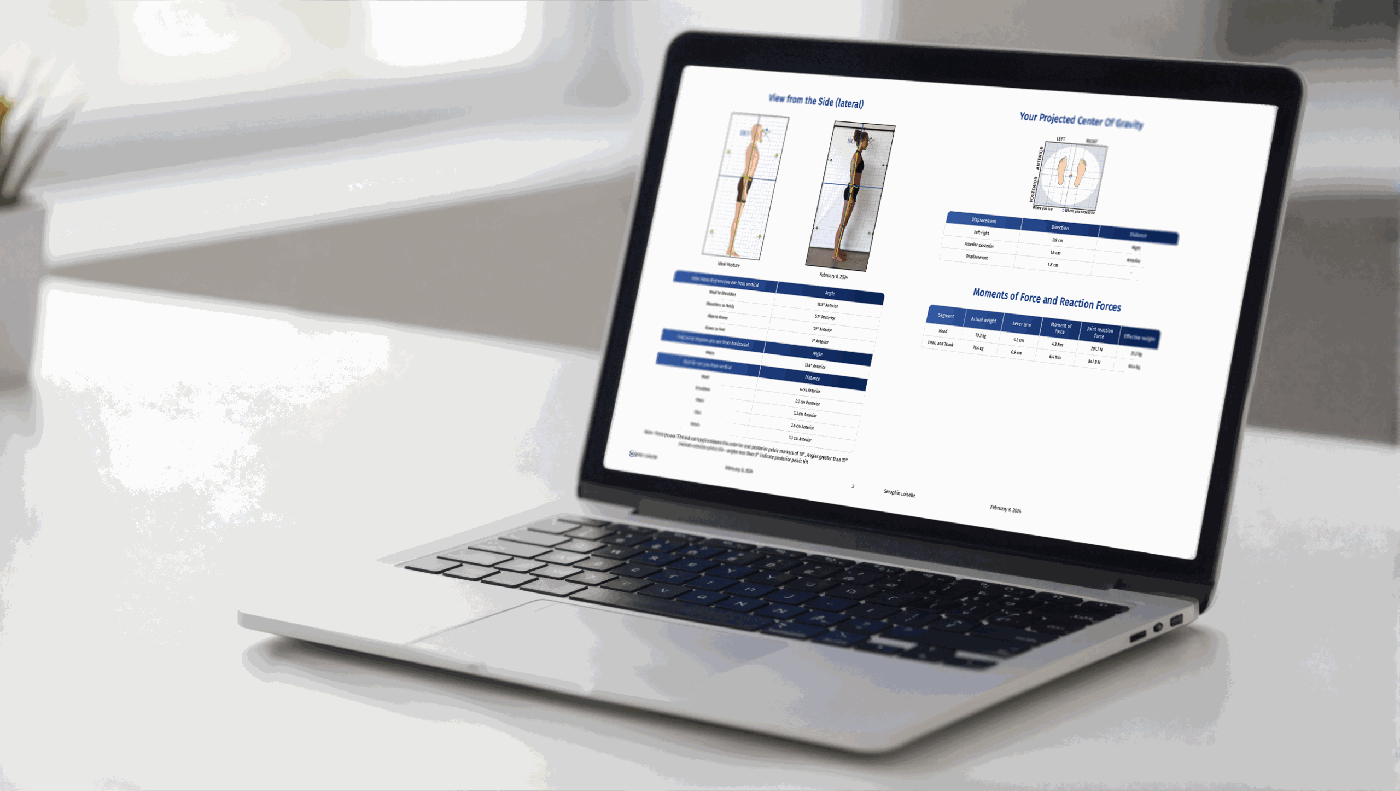
Interpreting the report
- Prioritization. The system ranks deviations by severity and importance. Core issues (head/trunk) are weighted higher than distal issues (limbs).
- Center of gravity (CoG). The report plots the projected CoG. Displacement from center (0,0) indicates the patient is fighting gravity, often recruiting excess muscle tone.
- Effective weight. Use this to explain load: "Your forward head posture makes your head act as if it weighs 20 lbs instead of 14 lbs."
Corrective exercise program
- A 10-week exercise program is automatically generated from the specific deviations found.
- Customization. Add or remove deviations manually in the "Deviations" tab to alter the prescribed exercises.
- Sharing. Email the PDF report directly to the client, or print it.
6. Troubleshooting & Support
| Issue | Solution |
|---|---|
| "Subscription expired" | Confirm you purchased a membership at biotonixposture.com. If purchased, make sure you created a password via "First sign in". |
| Page won't load / blank | Use Google Chrome. Clear the browser cache (Ctrl+Shift+Del) and reload. |
| Calibration failed (red X) | Check lighting (no windows behind the patient), ensure the camera is perpendicular, and verify the canvas markers are visible. |
| Yellow markers | An AI "verify" flag. Check the point; if it looks correct, proceed. If not, adjust it on the web portal. |
7. Useful Resources & Community Links
Community
- Facebook group. Connect with other professionals in the official community — join here.
Video tutorials (English)
Contact support
- WhatsApp (text support): +1 450-912-6702
- Email: info@biotonixposture.com